
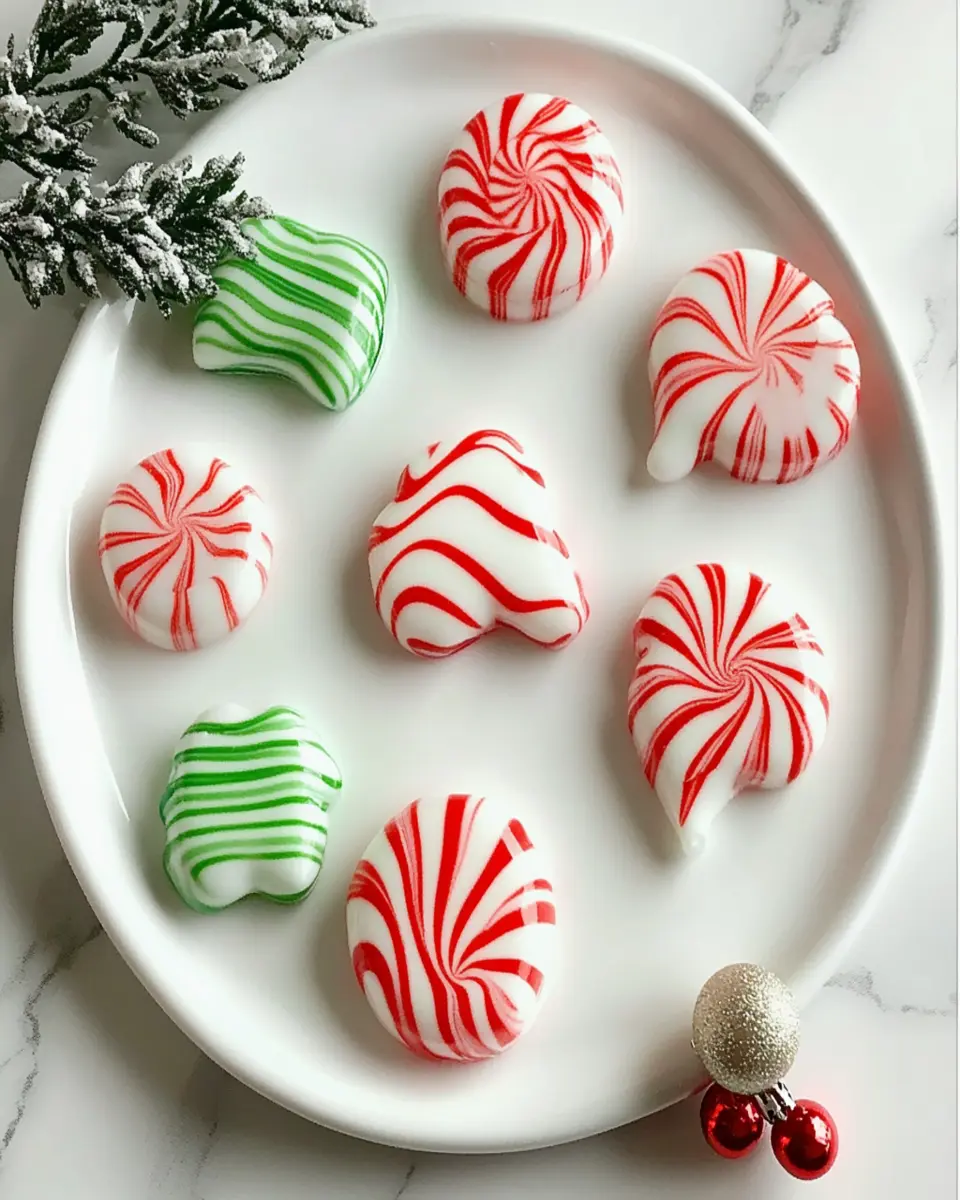
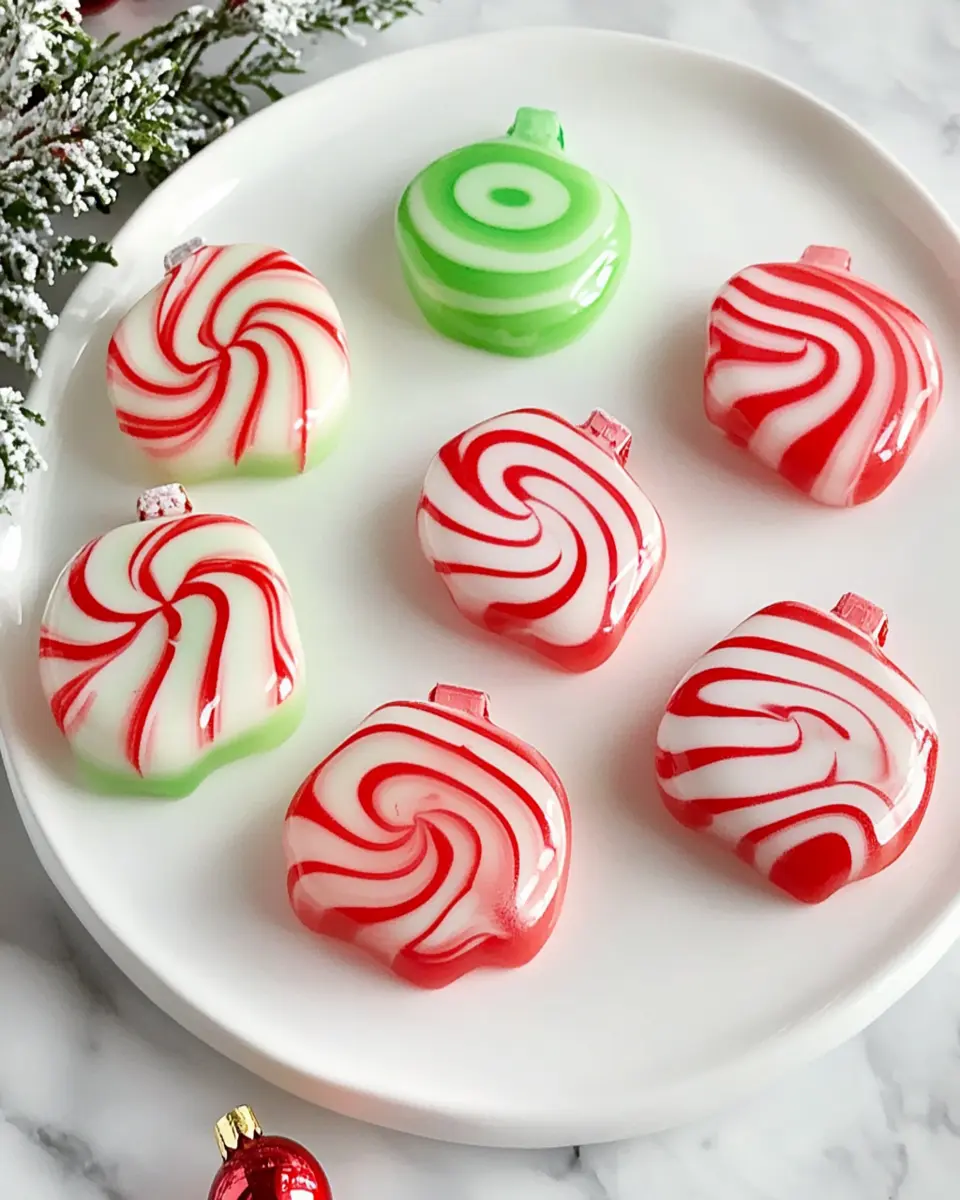
Introduction to Melted Peppermint Candy Ornaments
The holiday season brings joy, creativity, and a chance to make lasting memories with loved ones. One delightful way to celebrate is by crafting your own festive decorations, like melted peppermint candy ornaments. This fun holiday craft is not only easy to make but also engages children in the kitchen, making it a perfect family activity. Imagine the sweet aroma of melting peppermint filling your home while you create beautiful ornaments that can adorn your tree or be gifted to friends and family.
Why Melted Peppermint Candy Ornaments?
Creating melted peppermint candy ornaments is a simple yet rewarding project that allows you to express your creativity. The vibrant colors and delightful scents of peppermint make these ornaments a charming addition to any holiday decor. Plus, they provide a great opportunity to teach kids about the joys of cooking and crafting. As you melt the candies, you can talk about the different shapes you can create, encouraging your child’s imagination.
Not only are these ornaments visually appealing, but they also serve as a sweet treat after the holiday festivities. Once your ornaments are complete, you can hang them on the tree, use them as gift toppers, or even enjoy them as a sugary snack. This craft is perfect for young professionals and homemade-food lovers looking for a quick but meaningful holiday project that won’t take much time out of their busy schedules.
Gather your ingredients and get ready to make some enchanting melted peppermint candy ornaments this holiday season! You’ll be amazed at how simple it is to create something beautiful with just a few ingredients and a little bit of imagination.
Key Ingredients
Creating melted peppermint candy ornaments is all about using a few simple ingredients that yield delightful results. Let’s break down these key components for your festive craft!
Peppermint Candies (2 cups)
These colorful candies are the star of the show! Their vibrant hues and refreshing flavor melt beautifully in the oven, transforming into art. Choose classic peppermint for traditional ornaments or explore other flavors for a unique twist.
Cookie Cutter (1)
The cookie cutter shapes your melted candies into festive designs. Whether you opt for stars, hearts, or holiday-themed shapes, this tool is essential for crafting eye-catching ornaments that will brighten up your holiday decor.
Parchment Paper (1)
This handy kitchen staple is crucial for preventing the melted candies from sticking to the baking sheet. It ensures a smooth release and keeps your ornaments intact, making clean-up a breeze!
Baking Sheet (1)
A sturdy baking sheet is necessary for holding your cookie cutter and candies in the oven. It provides even heat distribution, helping your ornaments melt uniformly for that perfect glossy finish.
Gather these ingredients, and you’re ready to embark on a fun holiday crafting adventure with melted peppermint candy ornaments!

Why You’ll Love This Recipe
The melted peppermint candy ornaments are the perfect blend of creativity and festivity, making them an ideal holiday craft for kids and adults alike. With just a few ingredients and minimal prep time, you can transform simple peppermint candies into delightful decorations that brighten up your home. This recipe not only engages children but also fosters a sense of accomplishment as they see their creations come to life.
Quick and Easy Crafting
In our busy lives, finding time for fun and creative activities can be challenging. This craft takes only about 10 minutes of preparation and 7 minutes of baking, allowing you to enjoy quality time with your kids without overwhelming your schedule. Plus, the delightful smell of melting peppermint will fill your kitchen, creating a joyful atmosphere.
Fun for Everyone
What’s more exciting than making edible ornaments? Kids will love choosing their favorite cookie cutter shapes, and parents can join in the fun by helping to monitor the baking process. These ornaments double as sweet treats, making them a hit at holiday gatherings. Whether you hang them on the tree or gift them to friends, these melted peppermint candy ornaments are sure to bring smiles all around.
Variations
Creating melted peppermint candy ornaments opens the door to a world of creativity and fun variations that can enhance your holiday crafting experience. Whether you’re looking to change up the colors, shapes, or even the flavor profiles, there are numerous ways to make this craft uniquely yours.
Colorful Creations
One simple variation is to use a mix of peppermint candies in different colors. By combining traditional red and white peppermint candies with green or even blue ones, you can create vibrant ornaments that stand out on your tree. Consider using seasonal colors like gold and silver for a more elegant touch.
Shape It Up
Don’t limit yourself to just one cookie cutter shape! Experiment with various cookie cutters to create holiday-themed ornaments that reflect your style. From Christmas trees to snowflakes, stars, and candy canes, the possibilities are endless. You could also create themed sets; for example, make a series of stars and moons for a celestial theme.
Flavor Infusions
While peppermint is a classic choice, why not experiment with different flavors? Try using cinnamon or butterscotch candies to add a unique twist to your ornaments. Combining flavors can result in a delightful and aromatic experience when the candies melt, providing not just visual appeal but also a sweet scent that fills your home.
These variations give you the freedom to unleash your imagination while crafting melted peppermint candy ornaments. Each variation adds a personal touch, making your holiday decorations even more special.
Cooking Tips and Notes
Creating melted peppermint candy ornaments is a delightful experience, but a few tips can help ensure your crafting goes smoothly. Here are some handy notes to keep in mind while you enjoy this fun holiday craft.
Monitor the Melting Process
Baking your peppermint candies requires attention. As they melt, keep a close eye on them to prevent burning. The goal is to achieve a smooth, glossy finish that retains its shape, so making sure they are removed from the oven at just the right time is essential.
Experiment with Shapes
Don’t hesitate to try various cookie cutter shapes! From festive stars to whimsical snowflakes, the possibilities are endless. Each unique shape can add a personal touch to your ornaments, making them even more special for your holiday decor.
Let Them Cool Completely
After baking, patience is key. Allow the ornaments to cool completely before attempting to remove them from the cookie cutter. This ensures they hold their shape and prevents any breakage during the removal process.
With these tips, you’ll be well-equipped to create stunning melted peppermint candy ornaments that will bring joy to your holiday season!
Serving Suggestions
Melted peppermint candy ornaments not only serve as delightful decorations but can also be enjoyed in creative ways during the holiday season. Hang them on your tree for a sweet touch, or use them as unique gift toppers to add a personal flair to your presents.
Creative Uses
Consider using these ornaments as part of your holiday table setting. They can be placed on plates as edible decorations, or arranged in a festive bowl for guests to enjoy. These colorful ornaments can also be included in craft projects, like wreaths or garlands, bringing a delightful aroma and look to your holiday decor.
With these suggestions, you can maximize the joy and beauty of your melted peppermint candy ornaments, making your holiday celebrations even sweeter!
Time Breakdown
Creating melted peppermint candy ornaments is a quick and enjoyable craft that fits perfectly into your busy holiday schedule. Here’s a simple breakdown of the time involved:
Preparation
10 minutes
Cooking/Baking
7 minutes
Total
17 minutes
This efficient time frame allows you to whip up colorful and festive decorations without taking too much time away from your holiday festivities. Plus, it’s a fun activity that kids can help with, making it a great way to bond while getting ready for the holidays!
Nutritional Facts
Melted peppermint candy ornaments are not only a fun craft but also a sweet treat that kids will love. Each ornament contains approximately 50 calories, making them a delightful addition to your holiday festivities without overwhelming sugar content. With 10 grams of sugar and no fat or cholesterol, these ornaments are a guilt-free indulgence that can add a festive flair to your celebrations. Enjoy them as a decorative treat, knowing they are a fun and tasty part of your holiday experience!
FAQ based on “People Also Ask” section
What are melted peppermint candy ornaments?
Melted peppermint candy ornaments are festive decorations made by melting peppermint candies in cookie cutter shapes. This fun and creative craft is perfect for kids, allowing them to engage in a hands-on project that results in sweet holiday decor.
How do you make melted peppermint candy ornaments?
To make these ornaments, you simply place peppermint candies in a cookie cutter on a lined baking sheet, bake them until melted, and then let them cool before removing the cookie cutter. It’s a straightforward process that takes about 17 minutes in total, making it an ideal craft for busy families.
Can you use other types of candy for ornaments?
Yes! While peppermint candies are traditional, you can experiment with other types of hard candies like butterscotch or cinnamon for different flavors and colors. Just be mindful that melting times may vary based on the type of candy used, so keep an eye on them while baking.
How do you hang the ornaments?
Once your melted peppermint candy ornaments have cooled completely, you can use a ribbon to hang them. Simply poke a hole near the top of the ornament before it fully sets, or you can use a small piece of clear tape to attach the ribbon after they have cooled.
How long do these ornaments last?
Melted peppermint candy ornaments can last a few weeks when stored in a cool, dry place. However, avoid exposing them to heat or moisture, as this can cause them to become sticky or lose their shape. Enjoy crafting these sweet and colorful ornaments to decorate your holiday season!
Conclusion
Creating melted peppermint candy ornaments is more than just a fun holiday craft; it’s an opportunity for families to bond and unleash their creativity. This engaging project allows kids to express themselves while crafting colorful, edible decorations that add a festive touch to any home.
With just a few simple ingredients and minimal time required, you can transform ordinary peppermint candies into charming ornaments that will delight both children and adults. These ornaments not only serve as delightful decor but also as sweet treats to enjoy throughout the holiday season.
So gather your supplies, invite your kids into the kitchen, and enjoy crafting these unique melted peppermint candy ornaments together. Don’t forget to share your creations with friends and family—after all, the joy of the holidays is best when shared! Cook, save, share, and comment on your experiences with this enchanting holiday craft!
Print
Melted Peppermint Candy Ornaments: Fun Holiday Craft for Kids
- Total Time: 17 minutes
- Yield: 6 ornaments 1x
- Diet: N/A
Description
Create your own festive melted peppermint candy ornaments with this fun and creative holiday craft that kids will love.
Ingredients
- 2 cups peppermint candies
- 1 cookie cutter (any shape)
- 1 parchment paper
- 1 baking sheet
Instructions
- Preheat your oven to 350°F (175°C).
- Line a baking sheet with parchment paper.
- Place peppermint candies on the parchment paper inside the cookie cutter.
- Bake in the oven for about 5-7 minutes, or until the candies melt.
- Let cool completely before removing from the cookie cutter.
- Use a ribbon to hang the ornaments.
Notes
- Experiment with different shapes and sizes of cookie cutters.
- Make sure to monitor the candies while baking to avoid burning.
- Prep Time: 10 minutes
- Cook Time: 7 minutes
- Category: Crafts
- Method: baking
- Cuisine: American
Nutrition
- Serving Size: 1 ornament
- Calories: 50
- Sugar: 10g
- Sodium: 0mg
- Fat: 0g
- Saturated Fat: 0g
- Unsaturated Fat: 0g
- Trans Fat: 0g
- Carbohydrates: 12g
- Fiber: 0g
- Protein: 0g
- Cholesterol: 0mg